 Recording gameplay videos on RetroPie
Stop! This blog post is out of date – see Recording gameplay videos on RetroPie for a live version in github that may be more helpful.
Credits: this is a slightly corrected and shortened version of How To Record A GamePlay Video From A RetroPie by selsine, which is itself based on Recording Live Gameplay in RetroPie’s RetroArch Emulators Natively on the Raspberry Pi by Retro Resolution.
RetroPie is based on RetroArch. RetroArch has a feature to record gameplay videos, but the current version of RetroPie has it disabled, presumably because it was thought to be too intensive to run properly on a Raspberry Pi.
These instructions tell you how to turn the recording feature on, and set it up. This works perfectly on my Raspberry Pi 3, allowing me to record video and sound from games I am playing.
The code for this is here: github.com/andybalaam/retropie-recording – this was code written by RetroRevolution, with small corrections and additions by me.
Before you start, you should have RetroPie working and connected to the Internet, and updated to the latest version.
Note: you should make a backup of your RetroPie before you start, because if you type the command below you could completely break it, meaning you will have to wipe your SD card and start fresh.
Turning on the recording feature
RetroArch uses the ffmpeg program to record video. To turn on recording, we need to log into the Pi using ssh, download and compile ffmpeg, and then recompile RetroArch with recording support turned on.
Log in to the Pi using ssh
Find out the IP address of your Pi by choosing “RetroPie setup” in the RetroPie menu and choosing “Show IP Address”. Write down the IP address (four numbers with dots in between – for example: 192.168.0.3).
On your Linux* computer open a Terminal and type:
ssh pi@192.168.0.3
(put in the IP address you wrote down instead of 192.168.0.3)
When it asks for your password, type: raspberry
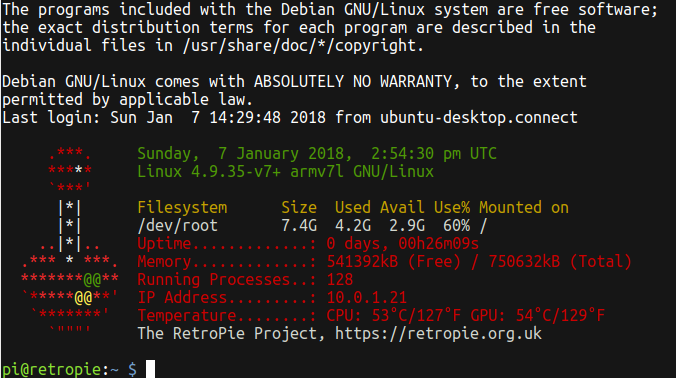
If this works right, you should see something like this:
* Note: if you don’t have Linux, this should work OK on a Mac, or on Windows you could try using PuTTY.
Download and compile ffmpeg
Log in to the RetroPie as described above. The commands shown below should all be typed in to the window where you are logged in to the RetroPie.
Download the script ffmpeg-install.sh by typing this:
wget https://github.com/andybalaam/retropie-recording/raw/master/ffmpeg-install.sh
Now run it like this:
bash ffmpeg-install.sh
(Note: DON’T use sudo to run this – just type exactly what is written above.)
Now wait a long time for this to work. If it prints out errors, something went wrong – read what it says, and you may need to edit the ffmpeg-install.sh script to figure out what to do. Leave a comment and include the errors you saw if you need help.
Hopefully it will end successfully and print:
FFmpeg and Codec Installation Complete
If so, you are ready to move on to recompiling RetroArch:
Recompile RetroArch with recording turned on
Download the script build-retroarch-with-ffmpeg.sh by typing this:
wget https://github.com/andybalaam/retropie-recording/raw/master/build-retroarch-with-ffmpeg.sh
Now run it like this:
bash build-retroarch-with-ffmpeg.sh
It should finish in about 10 minutes, and print:
Building RetroArch with ffmpeg enabled complete
If it printed that, your RetroPie now has recording support! Restart your RetroPie:
Restart the RetroPie
Restart your RetroPie.
If you want to check that recording support is enabled, Look for “Checking FFmpeg Has Been Enabled in RetroArch” on the RetroResolution guide.
Now you need to set up RetroPie to record your emulator.
Setting up recording for your emulator
To set up an emulator, you need a general recording config file (the same for all emulators), and a launch config for the actual emulator you are using.
Create the recording config file
Log into the RetroPie as described in the first section, and type this to download the recording config file. If you want to change settings like what file format to record in, this is the file you will need to change.
wget https://github.com/andybalaam/retropie-recording/blob/master/recording-config.cfg
Create a launch config for your emulator
Each RetroPie emulator has a config file that describes how to launch it. For example, the NES emulator’s version is in /opt/retropie/configs/nes/emulators.cfg.
To get a list of all the emulators, log into your RetroPie and type:
ls /opt/retropie/configs
In that list you will see, for example, “nes” for the NES emulators, and “gb” for the GameBoy emulators. Find the one you want to edit, and edit it with the nano editor by typing:
nano /opt/retropie/configs/gb/emulators.cfg
(Instead of “gb” type the right name for the emulator you want to use, from the list you got when you typed the “ls” command above.)
Now you need to add a new line in this file. Each line describes how to launch an emulator. You should copy an existing line, and add some more stuff to the end.
For example, my version of this file looks like this:
lr-gambatte = "/opt/retropie/emulators/retroarch/bin/retroarch -L /opt/retropie/libretrocores/lr-gambatte/gambatte_libretro.so --config /opt/retropie/configs/gb/retroarch.cfg %ROM%"
lr-gambatte-record = "/opt/retropie/emulators/retroarch/bin/retroarch -L /opt/retropie/libretrocores/lr-gambatte/gambatte_libretro.so --config /opt/retropie/configs/gb/retroarch.cfg --record /home/pi/recording_GB_$(date +%Y-%m-%d-%H%M%S).mkv --recordconfig /home/pi/recording-config.cfg %ROM%"
default = "lr-gambatte"
lr-tgbdual = "/opt/retropie/emulators/retroarch/bin/retroarch -L /opt/retropie/libretrocores/lr-tgbdual/tgbdual_libretro.so --config /opt/retropie/configs/gb/retroarch.cfg %ROM%"
The line I added is coloured: The green parts are things copied from the line above, and the red parts are new – those parts tell the launcher to use the recording config we made in the previous section.
When you’ve made your edits, press Ctrl-X to exit nano, and type “Y” when it asks whether you want to save.
Once you’ve done something similar to this for every emulator you want to record with, you are ready to actually do the recording!
Actually doing a recording
Launching a game with recording turned on
In the normal RetroPie interface, go to your emulator and start it, but press the A button while it’s launching, and choose “Select emulator for ROM”. In the list that comes up, choose the new line you added in emulators.cfg. In our example, that was called “lr-gambatte-record”.
Now play the game, and exit when you are finished. If all goes well, the recording will have been saved!
(Note: doing this means that every time you launch this game it will be recorded. To stop it doing this, press the “A” button while it’s launching, choose “Select emulator for ROM” and choose the normal line – in our example that would be “lr-gambatte”.)
Getting the recorded files
To get your recording off the RetroPie, go back to your computer, open a terminal, and type:
scp pi@192.168.0.3:recording_*.mkv ./
This will copy all recorded videos from your RetroPie onto your computer (into your home directory, unless you did a cd commmand before you typed the above).
Now you should delete the files from your RetroPie. Log in to the RetroPie as described in the first section, and delete all recording files by typing this:
Note: This deletes all your recordings, and you can’t undo!
rm recording_*.mkv
Note: This deletes all your recordings, and you can’t undo!
Safer: recording onto a USB stick
Note: recording directly onto the RetroPie like we described above is dangerous because you could fill up all the disk space or corrupt your SD card, which could make RetroPie stop working, meaning you need to wipe your SD card and set up RetroPie again.
It’s safer to record onto a separate USB disk. To find out how, read “Recording to an External Storage Device” in Retro Resolution’s guide.
Hi, thanks for putting this together:)
Step 2 is failing for me though. There seems to be a problem with the line number reference in /retroarch.sh but I can’t figure it out.
When I launch build-retroarch-with-ffmpeg.sh, the script works up to this point before failing:
+ echo ‘=== Patching RetroArch code to enable ffmpeg ===’
=== Patching RetroArch code to enable ffmpeg ===
+ cd RetroPie-Setup
+ patch -p1
patching file scriptmodules/emulators/retroarch.sh
Hunk #1 FAILED at 40.
1 out of 1 hunk FAILED — saving rejects to file scriptmodules/emulators/retroarch.sh.rej
In my retroarch.sh file, “function build_retroarch” is actually on line 41. As a test I tried to bring everything up by one line but that didn’t work either.
Any ideas?
Ah, sorry to hear this. I am guessing the retroarch source code has been updated so my patch file doesn’t apply any more. I will need to update it when I get time, or if someone else can do it they should send me a merge request on GitHub.
Hey, I did a bit more digging and went back to retroresolution’s original how to. After running sudo ./retropie_packages.sh retroarch (to rebuild retroarch after removing the disable-ffmpeg flag), the script fails with:
“Could not successfully build retroarch – RetroArch – frontend to the libretro emulator cores – required by all lr-* emulators (/root/RetroPie-Setup/tmp/build/retroarch/retroarch not found).”
Found that some other people had the same issue but no solution was found. I suspect that the issue isn’t with your script so I think I’ll just give it another whirl with a fresh installation. I’ll let you know how it goes :)
Good luck Steve, and thanks for the info. Let us know.
Have you played around with Twitch streaming any from your pi? I have everything working except for N64 and PSP streaming. For some reason the game launches but the stream doesn’t start like it does for all other emulators. I read somewhere that those emulators may use more than the single core the others use, so maybe that has something to do with it?
Hi Chris, no I haven’t tried that – I’m surprised it works at all!
It actually works fairly well. It’s a similar setup to getting gameplay recording working.
I followed a guide on another blog post I found (http://selsine.com/2016/10/16/how-to-live-stream-to-twitch-from-a-retropie/)
Good to hear, thanks for the link!
I had issues running the ffmpeg-install.sh . I was getting “There are problems and -y was used without –force-yes”
Eventually I realized that the original folder I was in when I did step #1 was owned but root so I had to use “sudo wget…” I changed ownership of ffmpeg-install.sh and it seems to be running correctly now.
Never mind, same error.
and if I wanted to transmit the recording later on twitch what should I do?
Hi. I followed your instructions, but got the following errors right after start:
After I ran “bash ffmpeg-install.sh” I get this error:
pi@retropie:~ $ bash ffmpeg-install.sh
+ echo ‘Installing FFmpeg Suite’
Installing FFmpeg Suite
+ echo ———————–
———————–
+ echo
+ echo ‘=== Updating APT repo ===’
=== Updating APT repo ===
+ sudo apt-get update
Hit:1 http://archive.raspberrypi.org/debian stretch InRelease
Get:2 http://raspbian.raspberrypi.org/raspbian stretch InRelease [15.0 kB]
Get:3 http://raspbian.raspberrypi.org/raspbian stretch/main armhf Packages [11.7 MB]
Err:3 http://raspbian.raspberrypi.org/raspbian stretch/main armhf Packages
Hash Sum mismatch
Hashes of expected file:
– Filesize:11662764 [weak]
– SHA256:d01c7c7b4963cb29fe508f90104ff697f7f68b127e1546e88f7f880098a69d85
– SHA1:82848ac64aa65d092e7066352ddc5bc99d168135 [weak]
– MD5Sum:c46cdb694218cf7834c00a1493e13f5e [weak]
Hashes of received file:
– SHA256:3138f9acc731b771b152ceeee83e3e9769784cedfb368e2545472df6d0bb0b0a
– SHA1:1ed901f11928bd6f5b2a09118f055c70d2fa05ac [weak]
– MD5Sum:f5fcd94cb6aed37c8ac05bd253081fde [weak]
– Filesize:1551993 [weak]
Last modification reported: Mon, 05 Aug 2019 23:19:49 +0000
Release file created at: Mon, 05 Aug 2019 23:28:15 +0000
Fetched 1567 kB in 41s (38.1 kB/s)
Reading package lists… Done
E: Failed to fetch http://raspbian.raspberrypi.org/raspbian/dists/stretch/main/binary-armhf/Packages.xz Hash Sum mismatch
Hashes of expected file:
– Filesize:11662764 [weak]
– SHA256:d01c7c7b4963cb29fe508f90104ff697f7f68b127e1546e88f7f880098a69d85
– SHA1:82848ac64aa65d092e7066352ddc5bc99d168135 [weak]
– MD5Sum:c46cdb694218cf7834c00a1493e13f5e [weak]
Hashes of received file:
– SHA256:3138f9acc731b771b152ceeee83e3e9769784cedfb368e2545472df6d0bb0b0a
– SHA1:1ed901f11928bd6f5b2a09118f055c70d2fa05ac [weak]
– MD5Sum:f5fcd94cb6aed37c8ac05bd253081fde [weak]
– Filesize:1551993 [weak]
Last modification reported: Mon, 05 Aug 2019 23:19:49 +0000
Release file created at: Mon, 05 Aug 2019 23:28:15 +0000
E: Some index files failed to download. They have been ignored, or old ones used instead.
Then when trying to execute the second script “bash build-retroarch-with-ffmpeg.sh”, I get this error:
pi@retropie:~ $ bash build-retroarch-with-ffmpeg.sh
+ echo ‘Building RetroArch with ffmpeg enabled’
Building RetroArch with ffmpeg enabled
+ echo ————————————–
————————————–
+ echo
+ echo ‘=== Downloading patch file ===’
=== Downloading patch file ===
+ wget https://raw.githubusercontent.com/andybalaam/retropie-recording/master/enable-ffmpeg.patch
–2019-08-06 14:52:06– https://raw.githubusercontent.com/andybalaam/retropie-recording/master/enable-ffmpeg.patch
Resolving raw.githubusercontent.com (raw.githubusercontent.com)… 151.101.240.133
Connecting to raw.githubusercontent.com (raw.githubusercontent.com)|151.101.240.133|:443… connected.
HTTP request sent, awaiting response… 200 OK
Length: 690 [text/plain]
Saving to: ‘enable-ffmpeg.patch’
enable-ffmpeg.patch 100%[===================================================================================================================>] 690 –.-KB/s in 0s
2019-08-06 14:52:07 (3.95 MB/s) – ‘enable-ffmpeg.patch’ saved [690/690]
+ echo ‘=== Patching RetroArch code to enable ffmpeg ===’
=== Patching RetroArch code to enable ffmpeg ===
+ cd RetroPie-Setup
+ patch -p1
patching file scriptmodules/emulators/retroarch.sh
Hunk #1 FAILED at 40.
1 out of 1 hunk FAILED — saving rejects to file scriptmodules/emulators/retroarch.sh.rej
Any help highly appreciated. Thank you!
Hi Nicolas, I’m afraid it looks like my script has gone out of date and I’m afraid I don’t know how to fix it, sorry.
Never mind, thanks for your response! Everything has its lifetime, scripts are no exception ;-)
i tried to run ffmpeg-install.sh, but halfway through it said “+ git clone git://git.videolan.org/x264
Cloning into ‘x264’…
fatal: remote error: access denied or repository not exported: /x264
“. what do i do?
Hi Liam, I don’t know. It would be worth trying again since it might have been a momentary problem. However, I think this code is out-of-date now, so if you want to follow this you will need to understand and update it to suit the way things have changed in the meantime.
Andy:
Change the following line:
git clone git://git.videolan.org/x264
To:
git clone https://code.videolan.org/videolan/x264.git
Thanks Yavuz Selim – fix applied in the repo!