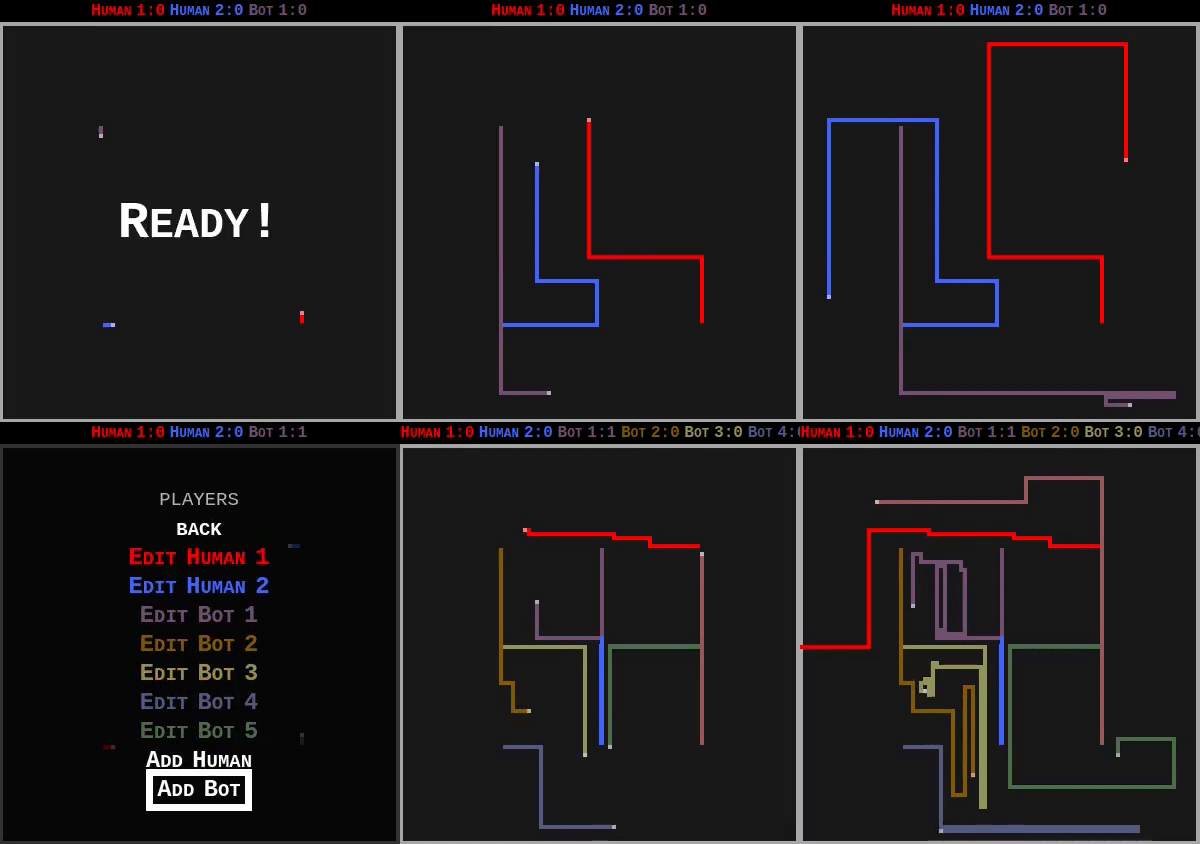
New game: Tron – frantic multiplayer retro action

My newest game is out now on Smolpxl Games – Tron:

Pixellated lines fight each other to stay alive

Play at smolpxl.gitlab.io/tron.

It’s a frantic multiplayer retro pixellated thingy playable in your browser. Try to stay alive longer than everyone else!

This version allows many players (up to 16 if you can manage it), and is quite pure in its implementation.

There are bots to play against, and you can gather your friends around a keyboard to play together.

Part of the motivation for writing this game was to test my new smolpxl-remote remote-play system, but this is not enabled yet, so watch this space…

I love playing games with other people – preferably at least 3 other people. In theory you could have 8 players around a keyboard playing this – send me a picture if you try!

One feature I worked on in the Smolpxl library for this game: saving configuration to local storage (and asking permission to do so). I ended up with a very ugly hack to do this, so a bit more work is needed before I merge it into the library.

Why write an entire game (including Graphics) in a single, hand-coded JavaScript file?

My new game, Rightwaves, is out now! It’s a tribute to the great classic R-Type.
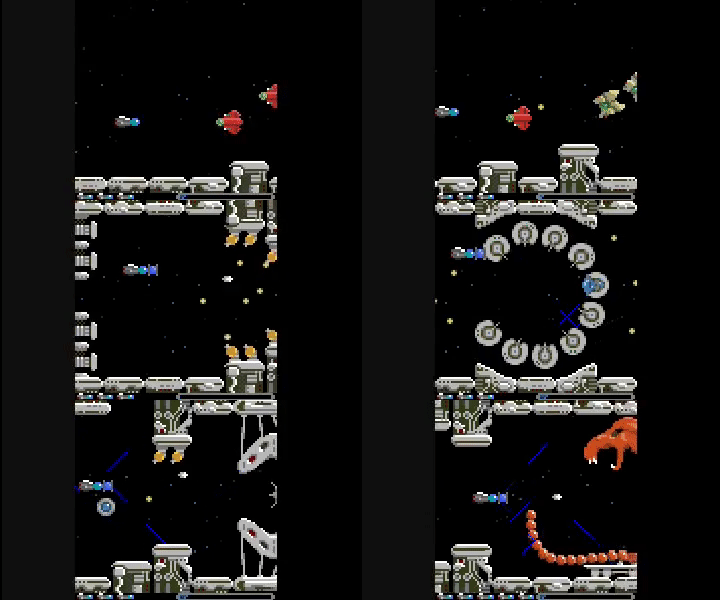
A pixel-art spaceship battles aliens

The entire implementation, including all the graphics, is contained within a single ~5000-line JavaScript file. Why?

This is a terrible idea

Let me start by saying I do not recommend writing code this way. It’s a terrible idea, and some aspects of the development process have been severely hampered by doing this.
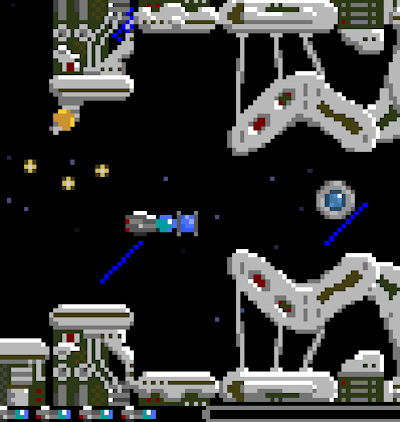
A pixellated spaceship dodges bullets and heads for a narrow passageway

Complexity

One of my goals for Smolpxl is to strip coding back to the simplest possible thing it can be.

Over the last 40 years, programming has changed a huge amount: the number and variety of the tools we have to work with has increased beyond what I can take in, and almost all of these things are utterly brilliant.

I can’t imagine writing a game like Eat Apples Quick using the line-orientated editor I used on the ZX Spectrum. I thoroughly enjoyed the Rust code completion and documentation I get from running rust-language-server inside NeoVim. (I’ve even heard there are editors that work inside a windowed environment, but I am not brave enough to try one.)
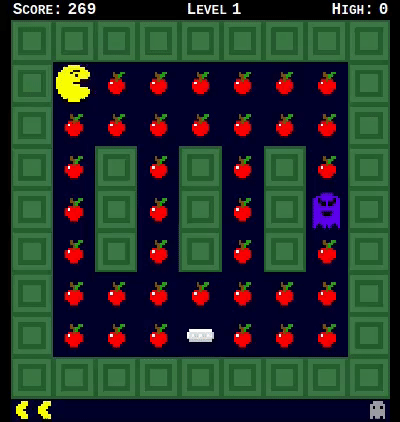
A pacman-like game

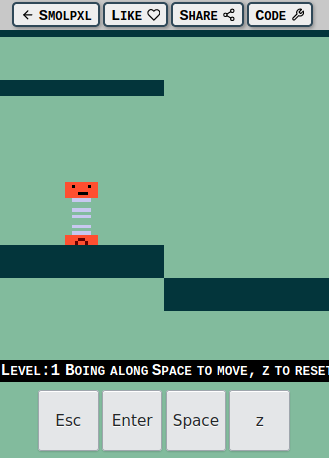
I can’t imagine writing the simple physics engine for Spring in assembly language, or trying to concentrate on that while I had to unravel complex graphics rendering conventions and timings. Instead, I was able to write code that looked a bit like the maths it represented, and allow the browser to handle the graphics card.

A spring with a cheery face bounces off a platform

But, along with all these powerful tools like high-level programming languages, fully cross-platform user interface components, and libraries that make writing a game loop simple, comes a new problem: complexity.

We must choose which tools, libraries and paradigms we’re going to use, and to make that choice we need to understand them.

The Smolpxl library makes some of these choices for you, by enforcing an Elm-style model/update/view split, providing a pixellated canvas of known size, and handling a game loop with fixed framerate. This is particularly suited to writing little retro-style games, similar to what I used to write in AMOS Basic on my Amiga.

I want to make everything simple, but I want our game to work on people’s computers. The only platform we can realistically choose is the browser: the exact same code works almost everywhere.

None of this explains why I would write a game inside a single file of source code, but hopefully it begins to demonstrate where I am coming from.

Simplicity

Another goal for Smolpxl is to teach programming, and a huge barrier I see to getting started is the build process.

No build

You can write Smolpxl games in Rust and compile them to WASM (which is how Eat Apples Quick is done), and you could also package the JavaScript with webpack or similar, but I want the first-class way of using Smolpxl to involve no build at all: I want you to be able to copy in a standard index.html and smolpxl.js and then write your code in game.js and have it just work when you double-click on index.html.

A goal for Rightwaves is to demonstrate that you can write a full game in Smolpxl, without stepping outside that simple story: just double-click on index.html.

It’s all inside game.js

So, Rightwaves is a single* JavaScript file containing the code, the level descriptions, and, probably most unusually, the graphics.

* Note: I cheated – the “action-replay” data is in a separate file – it was much bigger than the source code, and would have made it too hard to deal with. If I wanted to stay pure, I would have had to remove the default action replay from the game, but I just liked it too much.

Level design

Many times while I was writing Rightwaves, I wished I had written a level editor. In fact, I am often quoted as saying

“A game without a level editor is only half a game.”
— Andy Balaam, quite often

But instead, the level design is code like this:

const LEVELS = [
    {
        scenery: [
            { x:   0, y: 80, image: "machinery-20x16-01"},
            { x:  20, y: 88, image: "machinery-20x08-01"},
// ... etc.
        ],
        width: 1526,
        aliens: [
            newRedFlat(130, 20),
            newRedFlat(145, 25),
// ... etc.

The full code is at gitlab.com/smolpxl/rightwaves/-/blob/main/public/game.js#L3478.

It’s not a lot of fun to edit, but on the other hand, every time you make a change a simple refresh in the browser lets you see what it really looks like. No build process; no waiting.

Graphics

I drew the graphics for Rightwaves using GIMP, exported the images as PNG files, and converted them to text using a little Rust utility I wrote.

When I wanted to change an image, it was a nightmare, and I would recommend this approach to no-one whatsoever.

The reason why Smolpxl supports creating images in the source code is so you can hand-craft them right there, using an ASCII-art style.

Here’s the spaceship: An ASCII-art spaceship

and here is the code for it:

const IMAGES = {
    "ship": {
        pixels: [
            "..www.......",
            "dddddww.bbb.",
            "rllldddcccwb",
            "dddhlllccccb",
            "rddddddaccb.",
            "..aaa......."
        ],
        key: {
            "w": [255, 255, 255],
            "d": [88, 88, 88],
            "b": [77, 111, 249],
            "r": [141, 0, 0],
            "l": [126, 125, 125],
            "h": [192, 192, 192],
            "c": [3, 157, 157],
            "a": [42, 42, 42]
        }
    },
// ... lots, and I do mean lots, more here for the other graphics ...

The full code is at gitlab.com/smolpxl/rightwaves/-/blob/main/public/game.js#L41.

Note that I painstakingly coloured that code in for you, for this blog post. In the code there is no such luxury!

Openness

All the Smolpxl games are Free/Open Source software, of course. By avoiding a build, anyone can see the source code, just as I wrote, it in their browser. Anyone (including me) can debug problems without any extra steps. Putting everything in one file makes it easier to find the code (but probably makes it harder to understand).

Optimisation

Rightwaves loads really fast. On my machine, the first time you visit the page, it is playing within 1.4 seconds, after downloading 5 files at a total of 149kB (gzipped). If we exclude the included action replay, it is much smaller.

All of this, with no build process.

Maybe it wasn’t such a bad idea after all.

This is a bad idea

Don’t try this.

For fun

Except, of course, if you like fun. I tried this because it was fun. I would heartily recommend trying things because they might be fun.

Also, if you like fun, try playing the games on Smolpxl games, or write your own!

A puzzle game, a cross-the-road game, a tunnel game, a snake game, a Heli game, and a game-of-life thingy

Making Smolpxl work on phones and tablets

I’ve added the first features intended to make Smolpxl games work well on touch interfaces like phones and tablets:

Spring game with touch controls

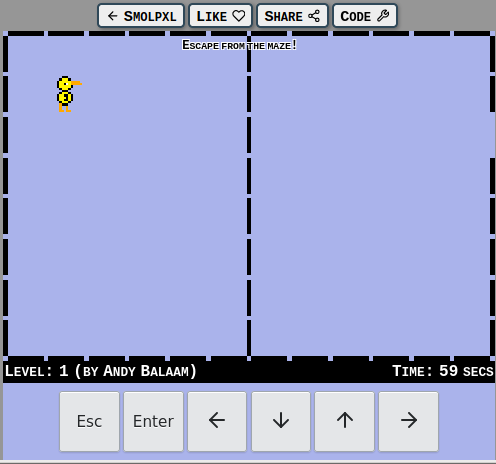
I’ve added a button bar at the bottom (and moved the navigation buttons to the top).

I’m looking for feedback on this:

  • Does it work on your device?
  • Are the buttons the right size?
  • Do they look ok? If not, how could they look better?
  • For games that require arrow keys, do you need them in the normal arrow-keys layout, or is a simple row fine?

Duckmaze game with touch controls in a single row

If you’re writing a game and you want to add buttons like this, you just need to add a single line like this:

game.showControls(["MENU", "SELECT", "BUTTON1", "BUTTON2"]);

or this:

game.showControls(["MENU", "SELECT", "LEFT", "DOWN", "UP", "RIGHT"]);

and they should appear.

Streaming video with Owncast on a free Oracle Cloud computer

I just streamed about 40 minutes of me playing Trials Fusion using Owncast. Owncast is a self-hosted alternative to streaming services like Twitch and YouTube live.

Normally, you would need to pay for a computer to self-host it on. Owncast suggest this will cost about $5/month.

But, Oracle Cloud has a “Always Free” tier that includes a “Compute Instance” (a virtual machine running Linux) that is capable of running Owncast.

Here’s how I did it:

Register for Oracle Cloud

This was probably the worst bit.

I went to oraclecloud.com and clicked “Sign up for free cloud tier”. It didn’t work in Firefox(!) so I had to use Chromium.

I had to enter my name, address, email address, phone number and credit card details. The email was verified, the phone number was verified (with a text message), and the credit card was verified (with a real transaction), so there was no getting around any of it.

They promise that they won’t charge my card. I’ll let you know if I discover differently.

Create a Compute Instance

Once I was logged in to the Oracle “console” (web site), I clicked the burger menu in the top left, chose “Compute” and then “Instances” to create a new instance. I followed all the default settings (including using the default “image”, which meant my instance was running Oracle Linux, which I think is similar to Red Hat), and when I got to the ssh keys part, I supplied the public key of my existing SSH key pair. Read the docs there if you don’t have one of these.

As soon as that was done, and I waited for the instance to be created and started, I was able to SSH in to my instance using a username of opc and the Public IP Address listed:

ssh opc@PUBLIC_IP

(Note: here and below, if I say “PUBLIC_IP”, I mean the IP address listed in the information about your compute instance. It should be a list of four numbers separated by dots.)

Allow connecting to the instance on different ports

Owncast listens for HTTP connections on port 8080, and RTMP streams on 1935, so I needed to do two things to make that work.

Modify the Security List to add Ingress Rules

  • On the information about my instance, I clicked on the name of the Subnet (under Primary VNIC).
  • In the subnet, I clicked the name of the Security List (“Default Security List for …”) in the Security Lists list.
  • In the Security List I clicked Add Ingress Rules and entered:
    Stateless: unchecked
    Source Type: CIDR
    Source CIDR: 0.0.0.0/0
    IP Protocol: TCP
    Source Port Range: (blank)
    Destination Port Range: 8080
    Description: (blank)

    and then clicked Add Ingress Rules to create the rule.

  • I then added another Ingress Rule that was identical, except Destination Port Range was 1935.

Allow ports 8080 and 1935 on the instance’s own firewall

It took me a long time to figure out, but it turns out the Oracle Linux running on the Compute Instance has its own firewall. Eventually, thanks to a blog post by meinside: When Oracle Cloud’s Ubuntu instance doesn’t accept connections to ports other than 22, and some Oracle docs on ways to secure resources, I found that I needed to SSH in to the machine (like I showed above) and run these commands:

sudo firewall-cmd --zone=public --permanent --add-port=8080/tcp
sudo firewall-cmd --zone=public --permanent --add-port=1935/tcp
sudo firewall-cmd --reload

Now I was able to connect to the services I ran on the machine on those ports.

Install Owncast

The Owncast install was incredibly easy. I just followed the instructions at Owncast Quickstart. I SSHd in to the instance as before, and ran:

curl -s https://owncast.online/install.sh | bash

and then edited the file owncast/config.yaml to have a custom stream key in it. You can do that by typing:

nano owncast/config.yaml

There is information about this file at: owncast.online/docs/configuration.

Run Owncast

I ran the service like this:

cd owncast
./owncast

In future, if I want to leave it running, I may run it inside screen, or even use systemd or similar.

Open the web site

I could now see the web site by typing this into my browser’s address bar:

http://PUBLIC_IP:8080

(Where PUBLIC_IP is the Public IP copied from the Instance info as before.)

Stream some video

Finally, in OBS‘s Settings I chose the Stream section and entered:

Service: Custom...
Server: rtmp://PUBLIC_IP/live
Stream key: STREAM_KEY

Where “STREAM_KEY” means the stream key I added to config.yaml earlier.

Now, when I clicked “Start Streaming” in OBS, my stream appeared on the web site!

Costs and limits

Oracle stated during sign-up that I would not be charged unless I explicitly chose to use a different tier.

The Compute Instance is part of the “Always Free” tier, so in theory it should stay up and working.

However, if you use lots of resources (which streaming for a long time probably does), I would expect services would be throttled and/or stopped completely. I have no idea whether they will allow enough resources for regular streaming, or whether this is all waste of time. We shall see.