Raspberry Pi Funniest Photo Game

For our latest Egham Raspberry Pi Jam, we worked on a photo booth program, using the Raspberry Pi camera. Here’s how we did it.

Downloads: funniest-photo-game.odp, photo-booth.zip.

Update 1: fixed a bug where it tried to create a directory that already exists

Update 2: see the winning photo!

Equipment

What we did

  • Made and decorated a box that held the Pi and camera steady for taking photos:
    Decorated Box for Raspberry Pi
    (Note the holes for the wires!)
  • Created some costumes (see “Costumes” below)
  • Wrote a Python program (see “Program” below) to display pictures on top of the camera picture, and take photos
  • Wrote up the instructions and competition rules

Costumes

We made lots of costumes that show up over the picture. They all needed to be 1280×720 pixels, PNG files that use Indexed Color mode. (In Gimp we clicked “Image”, then “Mode”, then “Indexed Color” before choosing “File” then “Export” or “Overwrite” to save them as .png files.)

Here are some examples:

Once we’d made the costumes we put them in a directory called “costumes” next to the program file, photo-booth.py.

Setup

To get the Pi ready to run our program we needed to type these commands:

sudo apt-get update
sudo apt-get install python-picamera
sudo apt-get install python-imaging

Once we’d done this, we created the Python program and directories described in the next section, and then we ran the program with:

python photo-booth.py

Program

We made a directory to hold our program on the Desktop of our Raspberry Pi, which we called “photo-booth”. Inside that, we made a “costumes” directory containing our costumes, and a “gallery” directory to hold the saved photos. Also inside “photo-booth” we saved this code as “photo-booth.py”:

import io
import picamera
from PIL import Image
import time
import pygame
import subprocess
import os

class PhotoBooth:
    def __init__( self, camera ):
        self.camera = camera
        self.costumes = os.listdir( 'costumes' )
        self.current_overlay = None
        self.cos_num= 0
        self.current_costume = None

        self.set_up_camera()

        self.change_costume(0)

    def set_up_camera(self):
        self.camera.resolution = ( 1280, 720 )
        self.camera.framerate = 24
        self.camera.start_preview()

    def change_costume(self, change):
        self.cos_num += change
        self.cos_num = self.cos_num%len(self.costumes)
        self.current_costume = Image.open( 'costumes/'+self.costumes[self.cos_num])
        self.overlay(self.current_costume, 128)

    def overlay(self, image, alpha):
        pad = Image.new('RGB', (
            ((image.size[0] + 31) // 32) * 32,
            ((image.size[1] + 15) // 16) * 16,
            ))
        pad.paste(image, (0, 0))

        if self.current_overlay is not None:
            self.camera.remove_overlay(self.current_overlay)

        self.current_overlay = camera.add_overlay(pad.tostring(), size=image.size)
        self.current_overlay.alpha = alpha
        self.current_overlay.layer = 3

    def take_photo(self):
        stream = io.BytesIO()
        camera.capture( stream, format='jpeg' )
        stream.seek( 0 )
        captimg = Image.open( stream )
        imgrgba = self.current_costume.convert("RGBA")
        captimg.paste( imgrgba, ( 0, -100 ), imgrgba )
        self.overlay(captimg, 255)
        captimg.save( 'gallery/photo%d.png' % time.time().real )
        self.overlay(self.current_costume, 128)

    def run(self):
            while True:
                for event in pygame.event.get():
                    if event.type == pygame.QUIT:
                        return
                    if event.type == pygame.KEYDOWN:
                        if event.key == pygame.K_LEFT:
                            self.change_costume(1)
                        if event.key == pygame.K_RIGHT:
                            self.change_costume(-1)
                        if event.key == pygame.K_SPACE:
                            self.take_photo()
                        if event.key == pygame.K_ESCAPE:
                            return
                        if event.key == pygame.K_g:
                            subprocess.call('ls gallery/*.png | head -1 | xargs xdg-open', shell = True)
                            return
                    if event.type == pygame.MOUSEBUTTONDOWN:
                        self.take_photo()

pygame.init()
pygame.display.set_mode()
if not os.path.exists( 'gallery' ):
    os.makedirs( 'gallery' )

with picamera.PiCamera() as camera:
    booth = PhotoBooth( camera )
    booth.run()

Download code and costumes

You can download the code and costumes we used here: photo-booth.zip.

If you have any questions, feel free to leave a comment below!

Launch an urgent window using Python and Xlib with the UrgencyHint flag

I am trying to fix a bug in lxpanel’s taskbar plugin, and needed to launch an urgent window. Here’s how I did it in a little python.

#!/usr/bin/python

# urgent.py -- launch an urgent window (Copyright messages are at the bottom)

# To use:
# sudo apt-get install python-xlib
# ./urgent.py

import sys
import Xlib
from Xlib import X, display, Xutil

d = display.Display()
s = d.screen()
w = s.root.create_window(
    50, 50, 300, 200, 2,
    s.root_depth,
    X.InputOutput,
    X.CopyFromParent,
    background_pixel = s.white_pixel,
)

w.set_wm_name( 'Urgent!' )
w.set_wm_hints( flags = Xutil.UrgencyHint )

w.map()

try:
    while 1:
        e = d.next_event()
except Xlib.error.ConnectionClosedError:
    pass


# This code is based on:
# examples/xrandr.py -- demonstrate the RandR extension
# from http://python-xlib.sourceforge.net/
#
#    Copyright (C) 2014 Andy Balaam
#    Copyright (C) 2009 David H. Bronke
#
#    This program is free software; you can redistribute it and/or modify
#    it under the terms of the GNU General Public License as published by
#    the Free Software Foundation; either version 2 of the License, or
#    (at your option) any later version.
#
#    This program is distributed in the hope that it will be useful,
#    but WITHOUT ANY WARRANTY; without even the implied warranty of
#    MERCHANTABILITY or FITNESS FOR A PARTICULAR PURPOSE.  See the
#    GNU General Public License for more details.
#
#    You should have received a copy of the GNU General Public License
#    along with this program; if not, write to the Free Software
#    Foundation, Inc., 59 Temple Place, Suite 330, Boston, MA  02111-1307  USA

Raspberry Pi Minecraft Python summer project screenshots

[Screenshots of Minecraft on the Raspberry Pi can’t be made with VNC or screenshot tool like scrot, but they can be made with the excellent raspi2png.]

We did some Python programming in Minecraft on the Raspberry Pi for our summer projects.

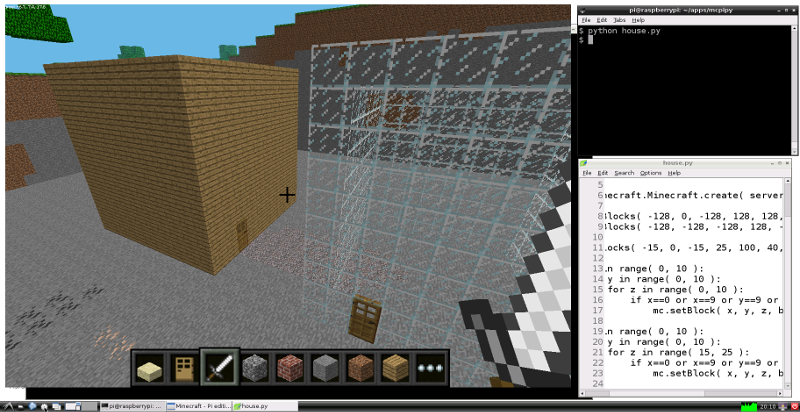
Child 2 made some lovely houses and enjoyed destroying things much more efficiently than when you do it by hand:

houses

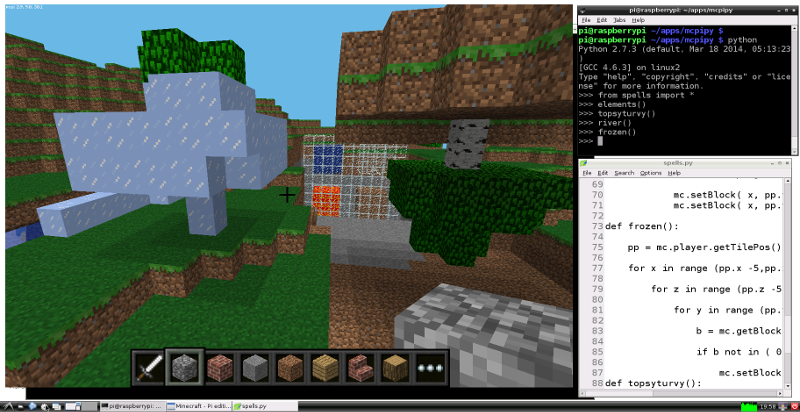
and Child 0 made a spell book. You can see the “elements” spell has been cast in the background (earth, air, water and fire), the “topsy-turvy” spell on the right, the “frozen” spell on the left, and on the far left you can just see a bit of the “river” spell:

spells

To cast spells you must first utter the magical incantations:

python

and then:

from spells import *

then each spell can be cast by simply saying its name followed by the double brackets of power, for example:

topsyturvy()

Absolute Truth in programming languages

Is enforcing truthfulness the opposite of beauty?

Can 2 + 2 = 5?

Improvements, corrections, further contributions are welcome.

$ cat five.cpp 
#include <iostream>
int operator+( int x, int y ) { return 5; }
int main() {
    std::cout << 2 + 2 << std::endl;
}
$ g++ five.cpp 
five.cpp:2:29: error: ‘int operator+(int, int)’ must have an argument of class or enumerated type
$ python
>>> int.__add__ = lambda y: 5
TypeError: can't set attributes of built-in/extension type 'int'
$ cat five.hs
import Prelude hiding ((+))
x + y = 5
main = print ( 2 + 2 )
$ ghc five.hs && ./five
5
$ cat five.rb
class Fixnum
    def +(y)
        5
    end
end
print 2 + 2
$ ruby five.rb
5
$ mzscheme 
> (define (+ x y) 5)
> (+ 2 2)
5